So,
When I first started streaming, I made a dual LED flasher circuit. Unfortunately, I forgot to save the recording of the stream. I decided to make it again and convert my LED statue sculpture into something very interesting.
The circuit is very simple and only uses a few parts. It can be made for under 4 dollars very easily.
Parts Needed:
- BC547-NPN 2
- LED (RED or GREEN or YELLOW) 2 [But in my case, I used 15. 14 as a tower in series and 1 externally]
- Resistors- 1Kx2 , 10Kx2
- Capacitors- 22uF x2
- 9V Power Supply x1
- Wire
Optional parts:
(Soldering Version)
- Proto-Board
- Soldering Equipment
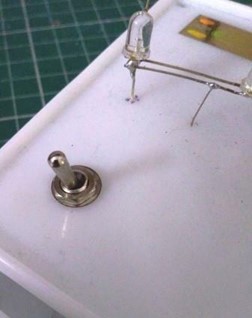
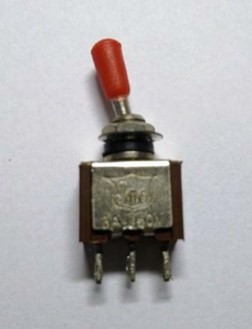
- Rocker Switch
(Breadboard Version)
- Breadboard x1
- Jumper Wires
I used a highly modified version of a circuit that I found online. In my first stream, I made the circuit on the breadboard. But I made it permanent by soldering the circuit on a protoboard for a project.
The circuit is a dual LED flasher powered by two transistors.
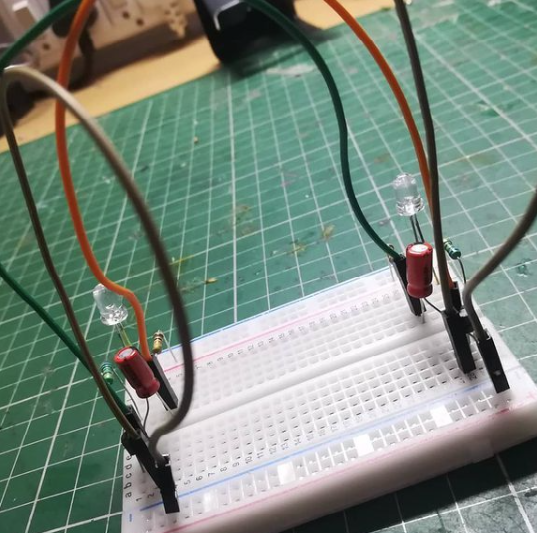
This is the circuit.
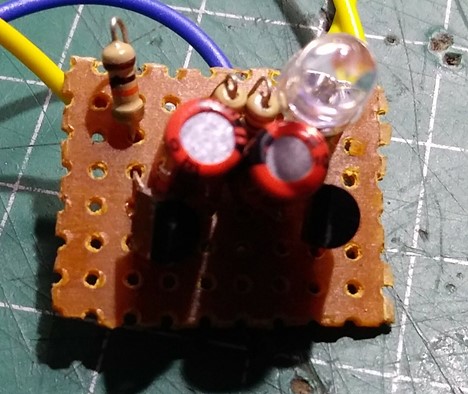
Since I combined the above circuit into a pre-existing LED Tower, I soldered it into a Vero board and made it permanent.
Now, you might say, Where is the second LED?
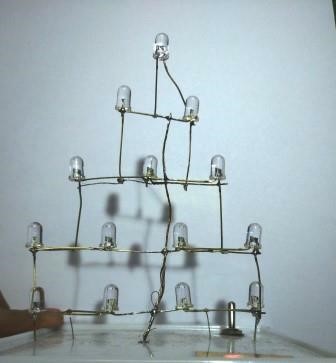
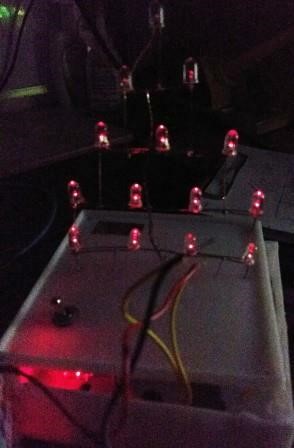
Well, I made a LED 2D Pyramid with 14 LEDs in Parallel.
I made it look like a triangle. But in 2d. It is a soldering task. I agree. But when lit. It looks very good.
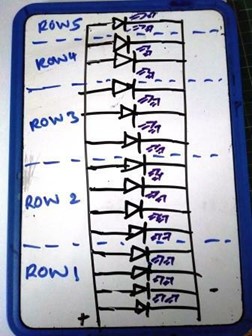
The circuit for the same is
I used a long copper wire to connect all of the ground. The LED on the perf-board will make the box its enclosed in glow. But the structure will blink indipendently.
I lowered the voltage and took a photo of the structure in action.

For enclosing the circuit, I used a blank CCTV Circuit enclosure box. You may get one from the link below.
I also used a rocker switch in series with the battery cable to make it function.
And I powered the whole circuit with a 9 volt battery.
And closed the whole enclosure with the screws provided. And the whole project was complete. You may make a similar project also. If you do, tweet with the hashtag #ImadeitESC
Thank You for making and supporting and of course reading till here. Comments are appreciated.
Project made for & by
Atul R
ESCcrasci
Leave a Reply